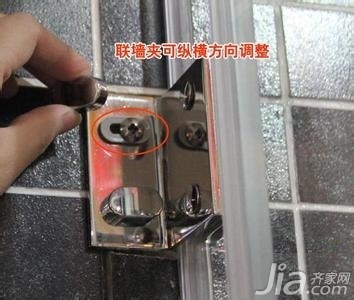
The meaning of the installation of the shower room

Shower room has a small footprint, can effectively achieve wet and dry separation, winter can play a number of advantages such as insulation, water vapor gathered in a narrow space, the heat will not quickly lost, the entire space is warm and comfortable. The comfort of the shower room is closely related to the installation. Therefore, the installation of the shower room is also very particular.
Shower installation process
1. Prepare and install the bottom basin : Regular shower room manufacturers will send professionals to come to the door to install, use the tool to carry together, more quickly and conveniently. The installation of the bottom basin must be careful, and testing the water is an indispensable part. If the house is installed, it may be difficult to make larger changes.
2. Pre-installation preparation : See if the product packaging is complete. After opening, check whether the configuration is complete. Prepare necessary tools for use and put them together for easy access.
Material Preparation: The materials used in the shower room installation include frames, tempered glass, pull handles, and pulleys.
Tool preparation: Many tools are needed during the installation of the shower room. Before installation, these tools should preferably be fully prepared. The tools used for this installation include tape measure, pencil, impact drill, hand hammer, electric screwdriver, glue gun, manual screwdriver, and wire cutters.
3. Install the bottom basin : Assemble the bottom basin parts and adjust the level of the bottom basin to ensure that there is no water in the basin or the pelvic floor. The hose can be telescopic with the distance, connecting the pelvic floor with the floor drain.
4. Tests, protection (important links) : Tests are required after installation to ensure unobstructed access to water. The installed bottom basin should also be protected in time before the installation of the house.

5. Housing installation : The safety of the shower room has an important relationship with whether the installation of the room is formal or not. Finding whether the hole is accurate, whether the fitting is properly installed, and whether the waterproof seal is done properly affects the normal use of the product. The strength and angle of installation are also difficult for ordinary people to grasp.
6. Finding and punching holes : Make sure that the pipes in the bathroom are in a row and prevent the concealment of pipes when they are punched. Use a pencil and a level rule to determine the drilling position of the aluminum material against the wall, and use the impact drill to drill holes.
7. Install aluminum (important link) : Knock in the rubber particles at the drill hole and lock the aluminum bar to the wall with screws. Pay attention to the need to continuously adjust while installing to maintain the verticality of the aluminum material.

8. Fixed glass (important link) : The glass is clamped and locked at the drilling hole of the bottom basin. The bottom of the flat glass or curved glass falls into the glass clamp groove and slowly pushes into the wall aluminum material. Then use screws to fix it.

9. Install the top pipe : Find the corresponding location above the fixed glass drill, install (straight/oblique) holder and connect the top pipe. Fix it to the top of the glass with a bender sleeve.
10. Equipment racks : Position the racks, tighten the plate nuts, and fix the plate glass to keep it vertical and horizontal. Pay attention to waterproofing under fixed glass aluminum.
11. Install the movable door (important link) : The hole for installing the wheel is already reserved on the general sliding door glass. The sliding door needs to use the pulley. Firstly, two wheels above the upper sliding door must be installed. After the wheel is mounted on the wheel, place it in the corresponding position, and then debug and install the lower wheel. Install the hardware of the movable door and install the hinge on the reserved hole of the fixed door. After loading, adjust the position of the axis of the lotus leaf until the door feels best.

12. Do a good job of waterproofing (important link) : Install a suction or water blocking strip on the side or bottom of the glass as required. Seam the aluminum with the wall, the glass and the bottom pot joint seam tightly with silicone. After the basic installation of the shower room is completed, glass glue is applied to the aluminum frame, wall, etc. to prevent water penetration.

13. Debugging and tightening (important links) : Check whether the various parts are comfortable and smooth, and find that problems should be adjusted in time. After adjusting, tighten the corresponding screws to make the shower room more secure.

14. Finishing work : At this point, the installation of the shower room has been completed, and the final step is to finish the work. Wipe the entire shower room clean with a rag, etc. In addition, install the tools, spare parts, etc., and pay attention to product protection.
Shower room installation precautions
1. After the shower room package is opened, please place the glass against the wall in a vertical position. Placed horizontally or unevenly, the glass may be damaged, causing property damage or personal injury.
2. When transporting, the glass can be broken easily by horizontal transport in the shower room. It must be carried vertically by two or more people at the same time, and avoid collision with hard objects.
3. Burning a cigarette, such as a cigarette, will destroy the spray or glass. Be sure to stay away from the fire.
4, do not stand, rely on the shower, do not place heavy objects in the shower room;

5. It is forbidden to use chemicals such as acids, alkalis and organic solvents and acidic cleaners when cleaning, otherwise the surface of the product will be damaged;
6. Use clean water or neutral detergent to clean the surface of the product. For stains that cannot be removed, use a clean cloth soaked with a small amount of alcohol to remove stains.
7. Acrylic products start to soften when heated to 100°C, so they should not be stored or used in a high temperature environment of 80°C or above.
8, the presence of static electricity on the acrylic board is easy to attach dust, when cleaning the acrylic bottom basin only use a cotton cloth dipped in a little soap and water can easily remove dust and achieve cleaning effect;
9, avoid contact with benzene, paint, paint cleaners and other strong organic solvents, if accidental contact may cause surface softening, dissolution and other endanger the occurrence of product quality phenomenon;
10. It is strictly forbidden to wipe the surface of the product with a sharp or abrasive article.
11. It is forbidden to wipe with a decontamination powder. The decontamination powder will corrode the surface and reduce the surface smoothness;
12. When using sealed silicone, do not apply silicone on the acrylic surface. If you do not care, do not rush to wipe, so it is more difficult to remove, should wait until the solid gently remove it, is strictly prohibited scratching with a hard object, otherwise it will lead to surface damage. After the bottom pot is installed, it should be used after the silicone is completely cured (silicone curing time is 24 hours).
Things that owners need to pay attention to in this step
When purchasing goods, some consumers choose some low-cost, poor-quality shower rooms in order to save money. After a period of use, the pulleys can't move, the accessories are damaged, and the water leakage is severe. , Manufacturers also have no safeguards in terms of maintenance, and even shirk responsibility and evade problems, so please pay attention to the choice of quality and service. The service life of a set of high-quality shower room is 3-5 times that of inferior shower room, and the use effect is even more difficult. Comparable.
Shower room decoration construction knowledge construction acceptance
Super Bright & Power Saving: 30W handheld LED WORK LIGHT, 1500 Lumen, replace 200W traditional halogen bulb by 30W COB LED and save 80% on electricity bill of lighting
LED Work Lights Portable & Flexibility: Because the rechargeable flood light is cordless. with a 180 degree adjustable lamp stand. So you can put it in anywhere just you like. led portable work light hanging on truck or hand held. Even on the ground, in the basement, garage or garden at night
3 Modes & Waterproof: Press the switch on button turn on the work light rechargeable: High, Low, Strobe Brightness Mode. IP65 Waterproof rating, ensure the rechargeable led work light works fine in rainy days
LED Work Light Rechargeable & Battery Powered: Powered by 2 18650 lithium-ion rechargeable batteries(included) or 4 AA batteries(not included), equipped a USB cable allows for quick and convenient charging. Also Serve as a convenient power bank for charging your phone and other devices in emergency
Portable Flood Light Widely Used: Camping, Hiking, Fishing, Barbecue, Car Repairing, Truck, Workshop, Construction Site, Job Site Lighting, Exploring and more Outdoor Activities
Led Work Light,Rechargeable Work Light ,Work Lamp,Rechargeable Led Work Light
Ningbo Wason Lighting Technology Co.,Ltd , https://www.nbwasonled.com